Six Transition Points For Seamless Edits

Plan Your Transitions: To really refine your visualization of a scene, have an idea of how the shots are going to cut together; where one shot may and where the next may begin. Here are six ways to make ‘seamless’ continuity edits.

As you plan your shot list for scene coverage, also visualize the transition points (cutting points) between the shots. This practice gives the editor enough material to create ‘invisible cuts’, or ‘continuity cuts’.

By Glen Berry, Edited by Stavros C. Stavrides


Plan Your Transitions

First let’s clarify what we mean by “Transition” for the purpose of this article.

A common reference to a film transition is the visual style of the transition between shots, such as fades or dissolves. Alternatively, a transition between scenes with starkly contrasting shots.

In this post, “transition” refers simply to a cutting point between shots within a scene.

We should not just plan how we will execute a shot during production, but how each shot might cut to the next during the picture edit. For refined visualization of a scene, we must have an idea of how the shots are going to cut together; where one shot ends and the next one begins.

Even if we do not know the exact moment for the perfect transition, we should have a general idea of where the editor will have at least a few choices on how the shots may cut together.

We looked at ways to cover a scene in Building Your Shot List. Now let’s think about how those shots may cut together.


This post is a support article for the chapter “Five Phases of Film Production” in
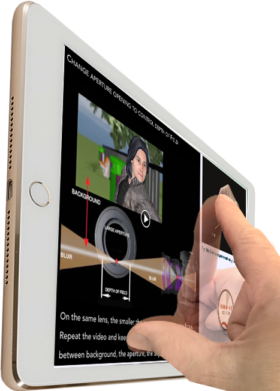
Cyber Film School’s Multi-Touch Filmmaking Textbook.
Version 2.0 now available at Apple Books.


To make a ‘continuity cut’ between two shots, the editor wants that cut ‘invisible’. The transition should not attention to itself, so the technique makes the transition unnoticeable, or ‘seamless.’

The role of the editor is to get an emotional impression of the material, read the director’s intent, and deliver the story in a seamless sequence of shots.  

It’s the director’s job to deliver the editor matching action in different shot sizes and angles, but also with an idea of how those shots will transition from one to the other.  

If you follow a few theoretical rules below and take some care with our shooting style, you’re a hero in the eyes of the editor by offering him or her enough room to maneuver.

Such foresight also lightens the burden on the production side. You’ll be a hero to the producer as well.

Our related article “Scene Coverage: You Can’t Film It All” explores the balance between Scene Coverage and available resource, you will see how important the planning of your transitions plays a part in the impact on time and money.

Six Common Transition Points

We established that the editor has a number of common conditions where he or she can make seamless edits if the director delivers sufficient coverage with a well-thought-out plan on how the shots will cut.

In theory, ideal transitions can be placed on a hierarchy of six of these common conditions shown below.

 At the top of this hierarchy, we start with the easiest type of transition for seamless, invisible edits.  As we move down the list, the conditions will still work to make an edit but require a bit more maneuvering.

1.  Moving Camera

A camera in motion always cuts.  The viewer’s eye tracks motion, so when the entire frame is in motion, the audience will accept the cut if it goes to another moving camera shot.  If as a director you want to end a moving camera sequence, stop the movement of the camera at some point within the last shot of the sequence.

2. Moving Subject

If the eye is tracking a moving subject such as an actor or vehicle, it makes a smoother cut, even if the shot itself is static. This is useful for cutting into or out of a shot.

3. The Eye Line
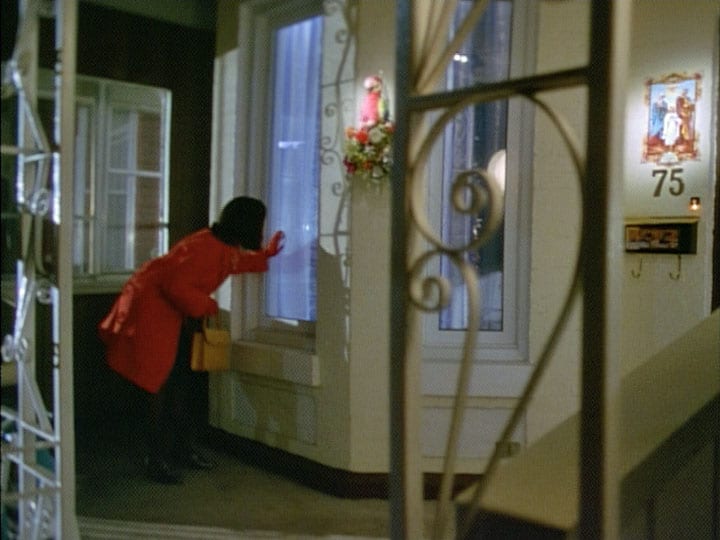
Natural human curiosity begs for a cut when the actor changes their eye line to something offscreen.

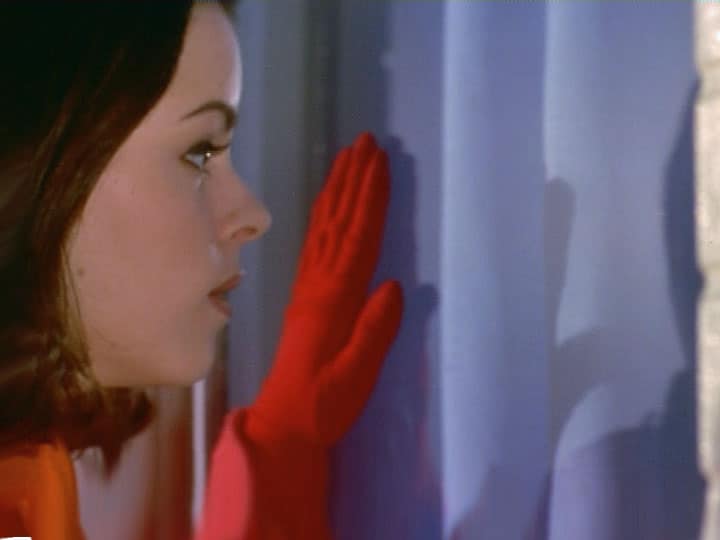
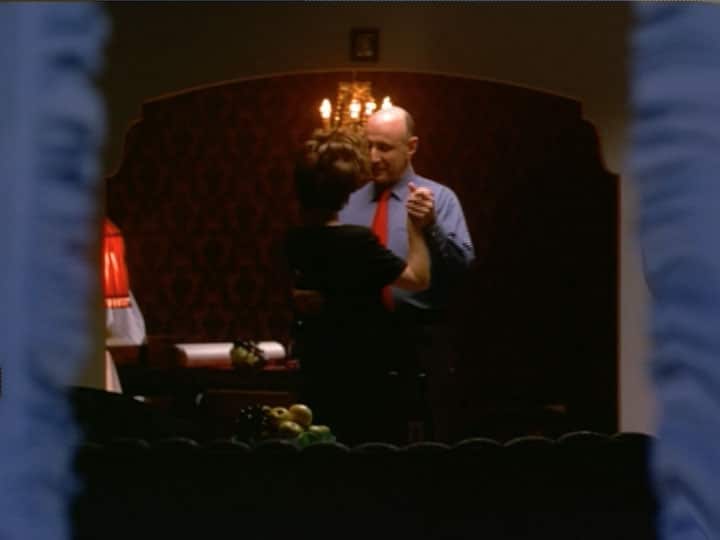
Let’s establish the geography above: A porch with a window that looks into a space screen right. A woman looks through the window screen right. Her POV (Point of View) shot of the inside naturally follows our expectations.

Another example: A diner with a bar at the center, and a door to the right of the bar.  Our subject at the bar, in a medium shot, turns their head to look off-screen to the right. Having already established the layout in the establishing shot, our audience will naturally expect to see the door in the next shot.  

It’s a psychological trick: curiosity begs for the edit, and reasonably expects to see something of interest at the door. This is a very effective technique.

4. Matching Action

A change in perspective is always accepted if you provide continuity of motion.  Find the same action on two shots and join them where the action matches and you will find a fluid transition.  

If the subject swings the other in a close shot, it is natural to cut to a wider shot to reveal the expanse of their movement, then back in for an emotional ‘punch’.  

5. Reverse Angles
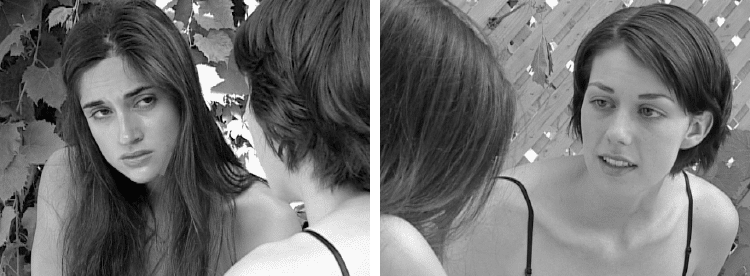
A view of the subject from one direction cuts well with a view from the opposite angle.  

Your first camera position is on Subject A in the foreground OTS (Over-The-Shoulder) of Subject B in a medium shot, offset by 30 degrees from the eye line between the two subjects, your reverse angle is on the opposite side with Subject B in the foreground and Subject A in a medium shot, offset 30 degrees.

6. Logic Cut

If in one shot an actor is picking up a set of keys, showing the actor driving a car in the next shot will provide a logical connection between the two events. It’s not a direct match cut in action, but rather what makes it work is our natural human tendency to seek rational sense out of a series of images.  

If you provide the viewer with a logical progression of events, the mind will naturally work to connect the events together into a narrative.

Conclusion

Please keep in mind that many of these conditions can be combined together to make an invisible edit and, in fact, the more of them you can utilize to make your edit, the better off you are.  

If you shoot with sufficient contrast between shots, utilize angle and reverse angle and cover all the action in the scene from at least two angles, your scene will cut together.  At the very least, you will have angle/reverse angle and contrast edits.  You should also have matching action if your actors do not have excessive performance variation.

However, the director is strongly advised to look for more well-defined ideas of how to make the edits work.  There’s no reason why a director can’t plan the start and end of shots around a look, a matching action, and the movement of actors in the scene.  

This is where the blocking of action in the scene can really play into the visualization of the director.  As the director sees the actual physical movement of the actors in the space, they can begin to plan the transitions around their actions and performance.

<< PREVIOUS
“Scene Coverage: You Can’t Film It All


5. Three Pitfalls of the Editor

Beginning editors often make the same mistakes when putting together first time projects. Here are three common pitfalls to which the editor can fall victim, and how to avoid them.

Contributed By Glen Berry
Edited By Stavros C. Stavrides

Important Concepts

Leave Out the Unnecessary
Don’t Think too Much
Exit Late, Leave Early

Just because they shot it, doesn’t mean you have to use it.

When the the analog film world gave over to less costly digital technology, production teams had a tendency to shoot massive amounts of footage and deliver an enormous amount of coverage to the editor.

This may be advantageous in the sense that it gives the editor a lot of options. However, editors now need to develop a new strength they didn’t need in the age of film: selectivity.

With more footage, the editor must realize that many good shots cannot be used or are not necessary to tell a story. This is why the post-production team should be separate from the production team.

If a person was there for the creation of the shot during production, they often have some kind of emotional attachment to the footage. You need a decision-maker in the edit who cares little about how hard it was to capture a shot, or how long it took.

The only thing the editor should care about is telling the story. That may mean rejecting shots that may have the best lighting, performance or timing.

The inexperienced editor may try to include many extra shots that were created in production but have no place in the final. There’s no reason why that extra material cannot be included in the rough cut — the director will want to see it anyway. But the smart editor will eliminate all shots that do not advance the story by the time the project evolves into the rough cut.

Don’t Overthink

Many times, edits will contain certain shots that might make sense intellectually but don’t play well on playback. For example, an errant shot within the sequence that isn’t on screen long enough to make sense of it.

Upon careful review, it makes intellectual sense why the shot would be included if you can stop the movie and look at the shot in the timeline. The audience cannot do this. The audience will see the movie play from start to finish once at one continuous speed, and feel it.  


This article is drawn from the “Five Phases of Production” chapter in Cyber Film School’s
Multi-Touch Filmmaking Textbook


This is how you need to view the sequence, like an audience, even though you’ve seen the cut a dozen times. Rely more on gut sense than the brain.

This is an emotional medium. Analyze but do not overanalyze. Avoid being hyper-sensitized to logical problems in your edit that are not going to be noticeable to the audience.

Many “problems” that you are seeing cannot be detected unless you slow down the movie and repeatedly review it shot by shot for countless hours. This is the process that we go through but that is also why you should try to adhere to the editing rule of thumb: one hour per finished minute for the rough cut. That helps prevent you from spending so much time with the edit that you start to overthink it.


Be sure to read our support article
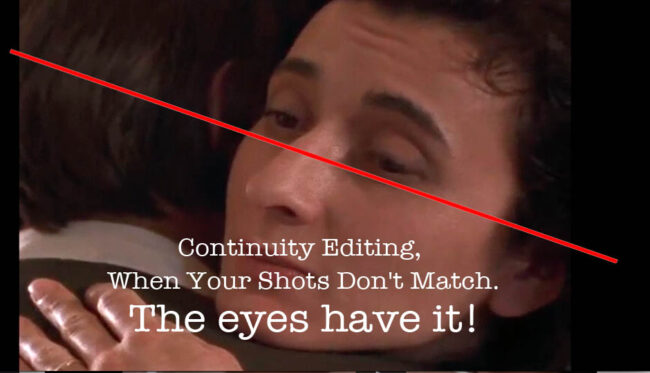
Continuity Editing: When Shots Don’t Match

Matching eyelines on continuity cut
Dealing with mismatching action, hair, or misplaced hands from shot to shot.

3. Exit Late, Leave Early

Another common error of the beginning editor is forgetting to trim their shots. When placing shots in the timeline to create a rough cut, it is advisable to place the full action with extra material at the head and tail. However, once you have determined your shot selection and order, you need to cut the heads and tails.

Try starting late on the action. Do not leave the shot on a door before it opens. Cut the shot as the door is in motion.

Don’t leave the shot after the actor has finished delivering their line.

Try cutting the shot before they have finished and bring the audio into the next shot to see the reaction of the other actor to the previous line.

These are some ways to create a flow to your movie. If you leave all the extra material in, the pace can drag and you’ll test the patience of your audience. There’s no easier way to make your movie dull and listless than to leave all those stale bits of pre-action and post-action in your piece.

You are not an editor yet if you don’t know how to tighten up your edit and make the footage propel the story along.


Be sure to read further application of “Exit Late, Start Early” at Screenwriting stage in out article:
Scene Design: Exit Late, Leave Early


Summary

• One of the harder parts of editing is choosing to leave things out. Just because you have the footage doesn’t mean you have to use it.

• Intuitive editing often leads to the best decisions. Agonizing over every possibility can destroy perspective.

• You can tighten the edit a great deal by trimming out less vital action at the head and tail of a shot to keep the story moving along. Hold on to your moments and cut the rest into a smart clip.

<< PREVIOUS
Editing The Narrative Short

Rough cut and fine cut assembly; creating the movie in post-production.


2. Post Production Workflow

Post-production is where filmmaking magic transforms raw footage into a compelling story, and often where ideas can reshape and refine a narrative. For beginner filmmakers, understanding the steps and the elements of this stage is key to creating a masterful film.

by Glen Berry
Edited by Stavros C. Stavrides


Key Concepts

  • Post-production is predictable compared to the chaos of filming.
  • The Rough Cut determines shot selection and sequence.
  • Picture Lock marks the point of no return for visual changes.
  • Edit the picture and dialogue, then play back without music to assess its narrative clarity.

The Six Steps of Post-Production

Compared to the relative chaos of Production, Post-Production is a more controlled environment and far more predictable, with a well-defined workflow.

The long hours of production can be stressful, schedules are tight, locations are unfamiliar, with a large number of people navigating it all.

Post-production is the opposite. There are fewer people, the hours are regular, schedules are planned and kept with precision, and the amount of material to work with is finite.

This guide walks you through the six essential steps of post-production:

1. Ingesting and Logging

Begin post-production by ingesting footage into your editing software. Organization is key—properly label and log your clips for easy reference throughout the process.
Beginner’s tip: prioritize proper labelling and organization here. It will save time for you or another editor later on. You’ll thank yourself.

That batch of materials handed over from Production should include the script, raw footage and audio, the camera logs prepped by the camera operator on location and the sound reports, if available.

These are likely copies of the camera’s original media. Loss of or damage to the originals would likely change the lives of those responsible.

At this stage, you transfer media from the camera to your local hard drive or editing system. This often involves transcoding files to more edit-friendly formats. Attention to bit rate, resolution, and quality is essential.

These technical aspects depend on your project’s needs, details of which are beyond the scope of this article, but information about bit rate and resolution for your needs is widely available.

Once the footage is ready, start logging each clip in the editing software from with info from camera logs and slate markers. Organizing shots makes it easier to navigate and choose footage during the editing process.

If you’re not the editor, stick to technical information during footage logging and media organization. The editor will make creative notes about each shot, regardless of the notes in the camera log.

2. The Rough Cut

Editing a rough cut has a straightforward objective: get the movie’s picture and dialogue, to play in a sequence from start to finish. As the name “Rough” suggests, it will not be perfect.

Don’t strive for perfection. Rough-cut film editing is about important decisions about shot selection and shot order.

If the action of each scene in the script was covered from more than one angle during production (‘getting coverage’), the editor must decide what perspective to use at any given moment in the scene and get the movie to play from start to finish.

Accept that the rough cut will lack final transitions, pacing, and other elements like music and effects–save those for the fine cut.

Though tempting and possible to add them at this stage, they can complicate a timeline and create extra work when recutting a scene when you or your director may WILL change your minds.

The point is to see the film come together as a whole.

3. The Fine Cut

Once the rough cut is approved, move to edit the fine cut, where you focus on refining transitions, trimming unnecessary footage, and perfecting the pacing.

A fine cut should be watchable without relying on music to pinpoint the narrative and fix problems, unless, of course, music is featured or plays a vital part in the scene, such as the performance of instruments or dance.

If there are sections that drag or seem rough, music may smooth them over but that is not the purpose of music. Music should emphasize moments or heighten the feeling of moments on the screen, not fix problems for the editor.

The narrative should flow smoothly, and every cut should serve a purpose.


This article is drawn from the “Five Phases of Production” chapter in Cyber Film School’s
Multi-Touch Filmmaking Textbook


4. Titles

Adding titles to the film titles can be easily added with most editing software. However, for complex designs that require graphic or video title effects, consider working with a specialist unless you have the necessary design skills.

Title cards or text overlays need to be clear, legible, and well-integrated into the film.

5. Picture Lock

Picture lock in film and video is not a process by itself is a critical milestone. Picture lock means that there will be no more changes to the picture.

Directors sometimes have a hard time with this. They want to keep noodling with the picture endlessly. This is why you want to make them sign a document indicating that the picture is now locked.

Picture lock is critical because this signifies that the editor’s job is done. The project can now be sent to a colorist, the composer, and the sound designer for finalization, although the composer and sound designer may have been involved to a degree during the latter portion of the rough cut.

Any changes to the picture can have very disruptive effects on their work and can result in enormous inefficiencies, blown deadlines, and unhappy people. When the picture is locked, it’s locked.

6. SoundTrack

The popular mistaken description of a soundtrack is the collection of pre-recorded songs included in a movie. However, this is not what we mean when we talk about the soundtrack.

When we use the term ‘soundtrack‘, we mean everything the audience actually hears when they watch the movie. The soundtrack is comprised of four elements:

  • Dialogue
  • Narration
  • Sound Effects
  • Music

Dialogue has already been determined by the editor and is delivered to the sound designer and composer along with the locked picture as reference material. If narration is used, a ‘scratch track’ (temporary track) should have already been developed and timed into the fine cut.

The sound designer is responsible for creating a rich and multi-layered mix of sound effects that do not interfere with the dialogue. Likewise, the composer creates a score that enhances and emphasizes the emotional moments of the piece.

Both the sound designer and the composer need the picture-locked movie with the dialogue track to do their jobs, which is why arriving at the picture lock is so critical.

Summary

•  Post Production is much more predictable and less stressful than production. Managing a post-production schedule is much easier than production

•  The rough cut is about shot selection and shot order. Do not worry about timing. Your efforts will be wasted when you are instructed to rebuild sequences after the first viewing.

•  Your fine cut has to play and be watchable without music. Do not rely on music to rescue a scene. Music will make it better but the scene needs to play without it.

•  When the producer or director has signed off on the picture lock, there will be no more changes to the edit. Get signatures on paper. Any changes to the edit after this point will be painful and expensive.

NEXT>>>
Post-Production Rules of Thumb >>

<< PREVIOUS
Introduction to Post-Production

Make Cinema Your Language

Cinema is a language we all understand, but not everyone ‘speaks’ it–directors do.

This interactive, self-guided textbook is a director’s toolbox, made for Apple Books.

Embrace a solid foundation with a future-proof, classic combo of theory, technique, history, and critical thinking. 

Gain practical, adaptable creative skills and insight that transcend technological changes, be it a camera, mobile device, or AI.

 Visit the Book Page Now