As you plan your shot list for scene coverage, also visualize the transition points (cutting points) between the shots. This practice gives the editor enough material to create ‘invisible cuts’, or ‘continuity cuts’.
By Glen Berry, Edited by Stavros C. Stavrides
Plan Your Transitions
First let’s clarify what we mean by “Transition” for the purpose of this article.
A common reference to a film transition is the visual style of the transition between shots, such as fades or dissolves. Alternatively, a transition between scenes with starkly contrasting shots.
In this post, “transition” refers simply to a cutting point between shots within a scene.
We should not just plan how we will execute a shot during production, but how each shot might cut to the next during the picture edit. For refined visualization of a scene, we must have an idea of how the shots are going to cut together; where one shot ends and the next one begins.
Even if we do not know the exact moment for the perfect transition, we should have a general idea of where the editor will have at least a few choices on how the shots may cut together.
We looked at ways to cover a scene in Building Your Shot List. Now let’s think about how those shots may cut together.
This post is a support article for the chapter “Five Phases of Film Production” in
Cyber Film School’s Multi-Touch Filmmaking Textbook.
Version 2.0 now available at Apple Books.
To make a ‘continuity cut’ between two shots, the editor wants that cut ‘invisible’. The transition should not attention to itself, so the technique makes the transition unnoticeable, or ‘seamless.’
The role of the editor is to get an emotional impression of the material, read the director’s intent, and deliver the story in a seamless sequence of shots.
It’s the director’s job to deliver the editor matching action in different shot sizes and angles, but also with an idea of how those shots will transition from one to the other.
If you follow a few theoretical rules below and take some care with our shooting style, you’re a hero in the eyes of the editor by offering him or her enough room to maneuver.
Such foresight also lightens the burden on the production side. You’ll be a hero to the producer as well.
Our related article “Scene Coverage: You Can’t Film It All” explores the balance between Scene Coverage and available resource, you will see how important the planning of your transitions plays a part in the impact on time and money.
Six Common Transition Points
We established that the editor has a number of common conditions where he or she can make seamless edits if the director delivers sufficient coverage with a well-thought-out plan on how the shots will cut.
In theory, ideal transitions can be placed on a hierarchy of six of these common conditions shown below.
At the top of this hierarchy, we start with the easiest type of transition for seamless, invisible edits. As we move down the list, the conditions will still work to make an edit but require a bit more maneuvering.
1. Moving Camera
A camera in motion always cuts. The viewer’s eye tracks motion, so when the entire frame is in motion, the audience will accept the cut if it goes to another moving camera shot. If as a director you want to end a moving camera sequence, stop the movement of the camera at some point within the last shot of the sequence.
2. Moving Subject
If the eye is tracking a moving subject such as an actor or vehicle, it makes a smoother cut, even if the shot itself is static. This is useful for cutting into or out of a shot.
3. The Eye Line

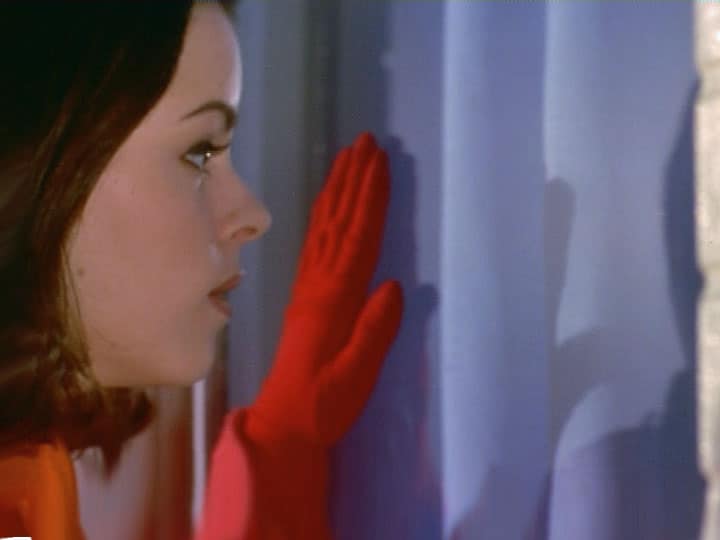
Natural human curiosity begs for a cut when the actor changes their eye line to something offscreen.
Let’s establish the geography above: A porch with a window that looks into a space screen right. A woman looks through the window screen right. Her POV (Point of View) shot of the inside naturally follows our expectations.
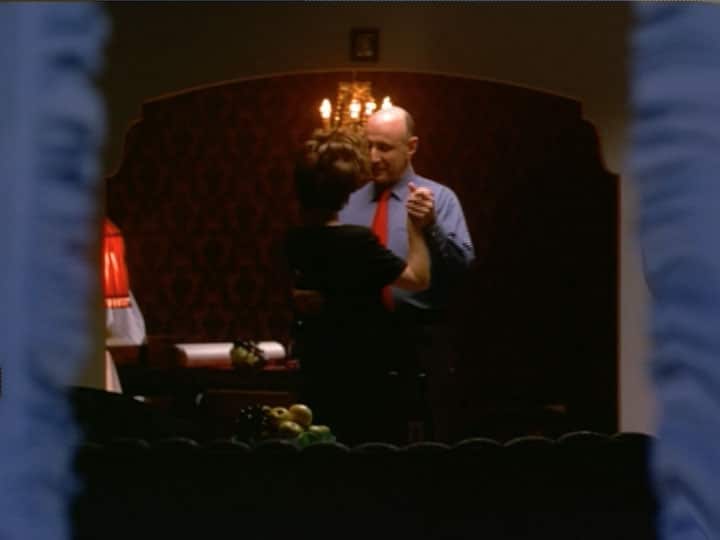
Another example: A diner with a bar at the center, and a door to the right of the bar. Our subject at the bar, in a medium shot, turns their head to look off-screen to the right. Having already established the layout in the establishing shot, our audience will naturally expect to see the door in the next shot.
It’s a psychological trick: curiosity begs for the edit, and reasonably expects to see something of interest at the door. This is a very effective technique.
4. Matching Action
A change in perspective is always accepted if you provide continuity of motion. Find the same action on two shots and join them where the action matches and you will find a fluid transition.
If the subject swings the other in a close shot, it is natural to cut to a wider shot to reveal the expanse of their movement, then back in for an emotional ‘punch’.
5. Reverse Angles
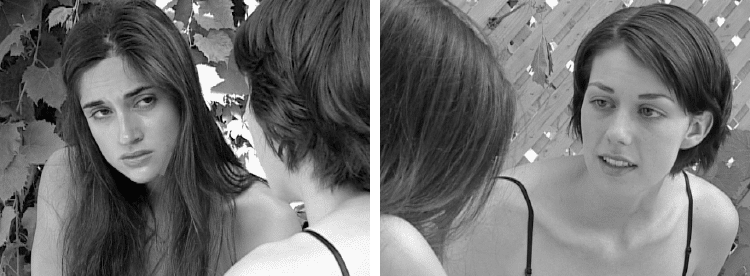
A view of the subject from one direction cuts well with a view from the opposite angle.
Your first camera position is on Subject A in the foreground OTS (Over-The-Shoulder) of Subject B in a medium shot, offset by 30 degrees from the eye line between the two subjects, your reverse angle is on the opposite side with Subject B in the foreground and Subject A in a medium shot, offset 30 degrees.
6. Logic Cut
If in one shot an actor is picking up a set of keys, showing the actor driving a car in the next shot will provide a logical connection between the two events. It’s not a direct match cut in action, but rather what makes it work is our natural human tendency to seek rational sense out of a series of images.
If you provide the viewer with a logical progression of events, the mind will naturally work to connect the events together into a narrative.
Conclusion
Please keep in mind that many of these conditions can be combined together to make an invisible edit and, in fact, the more of them you can utilize to make your edit, the better off you are.
If you shoot with sufficient contrast between shots, utilize angle and reverse angle and cover all the action in the scene from at least two angles, your scene will cut together. At the very least, you will have angle/reverse angle and contrast edits. You should also have matching action if your actors do not have excessive performance variation.
However, the director is strongly advised to look for more well-defined ideas of how to make the edits work. There’s no reason why a director can’t plan the start and end of shots around a look, a matching action, and the movement of actors in the scene.
This is where the blocking of action in the scene can really play into the visualization of the director. As the director sees the actual physical movement of the actors in the space, they can begin to plan the transitions around their actions and performance.
<< PREVIOUS
“Scene Coverage: You Can’t Film It All