5. Three Pitfalls of the Editor

Beginning editors often make the same mistakes when putting together first time projects. Here are three common pitfalls to which the editor can fall victim, and how to avoid them.

Contributed By Glen Berry
Edited By Stavros C. Stavrides

Important Concepts

Leave Out the Unnecessary
Don’t Think too Much
Exit Late, Leave Early

Just because they shot it, doesn’t mean you have to use it.

When the the analog film world gave over to less costly digital technology, production teams had a tendency to shoot massive amounts of footage and deliver an enormous amount of coverage to the editor.

This may be advantageous in the sense that it gives the editor a lot of options. However, editors now need to develop a new strength they didn’t need in the age of film: selectivity.

With more footage, the editor must realize that many good shots cannot be used or are not necessary to tell a story. This is why the post-production team should be separate from the production team.

If a person was there for the creation of the shot during production, they often have some kind of emotional attachment to the footage. You need a decision-maker in the edit who cares little about how hard it was to capture a shot, or how long it took.

The only thing the editor should care about is telling the story. That may mean rejecting shots that may have the best lighting, performance or timing.

The inexperienced editor may try to include many extra shots that were created in production but have no place in the final. There’s no reason why that extra material cannot be included in the rough cut — the director will want to see it anyway. But the smart editor will eliminate all shots that do not advance the story by the time the project evolves into the rough cut.

Don’t Overthink

Many times, edits will contain certain shots that might make sense intellectually but don’t play well on playback. For example, an errant shot within the sequence that isn’t on screen long enough to make sense of it.

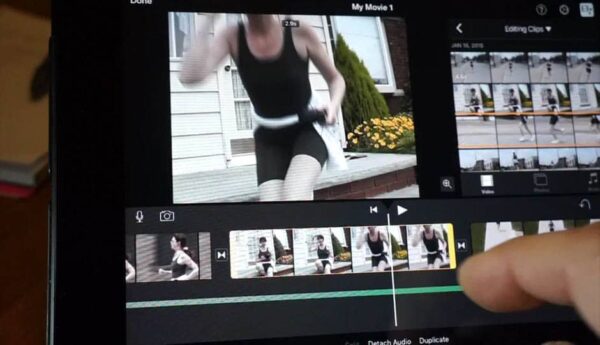
Upon careful review, it makes intellectual sense why the shot would be included if you can stop the movie and look at the shot in the timeline. The audience cannot do this. The audience will see the movie play from start to finish once at one continuous speed, and feel it.  


This article is drawn from the “Five Phases of Production” chapter in Cyber Film School’s
Multi-Touch Filmmaking Textbook


This is how you need to view the sequence, like an audience, even though you’ve seen the cut a dozen times. Rely more on gut sense than the brain.

This is an emotional medium. Analyze but do not overanalyze. Avoid being hyper-sensitized to logical problems in your edit that are not going to be noticeable to the audience.

Many “problems” that you are seeing cannot be detected unless you slow down the movie and repeatedly review it shot by shot for countless hours. This is the process that we go through but that is also why you should try to adhere to the editing rule of thumb: one hour per finished minute for the rough cut. That helps prevent you from spending so much time with the edit that you start to overthink it.


Be sure to read our support article
Continuity Editing: When Shots Don’t Match
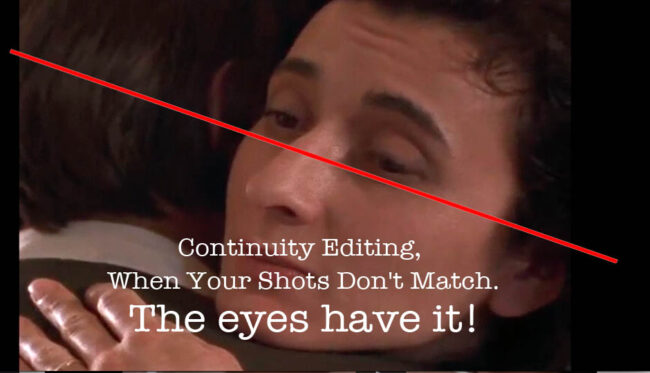
Matching eyelines on continuity cut
Dealing with mismatching action, hair, or misplaced hands from shot to shot.

3. Exit Late, Leave Early

Another common error of the beginning editor is forgetting to trim their shots. When placing shots in the timeline to create a rough cut, it is advisable to place the full action with extra material at the head and tail. However, once you have determined your shot selection and order, you need to cut the heads and tails.

Try starting late on the action. Do not leave the shot on a door before it opens. Cut the shot as the door is in motion.

Don’t leave the shot after the actor has finished delivering their line.

Try cutting the shot before they have finished and bring the audio into the next shot to see the reaction of the other actor to the previous line.

These are some ways to create a flow to your movie. If you leave all the extra material in, the pace can drag and you’ll test the patience of your audience. There’s no easier way to make your movie dull and listless than to leave all those stale bits of pre-action and post-action in your piece.

You are not an editor yet if you don’t know how to tighten up your edit and make the footage propel the story along.


Be sure to read further application of “Exit Late, Start Early” at Screenwriting stage in out article:
Scene Design: Exit Late, Leave Early


Summary

• One of the harder parts of editing is choosing to leave things out. Just because you have the footage doesn’t mean you have to use it.

• Intuitive editing often leads to the best decisions. Agonizing over every possibility can destroy perspective.

• You can tighten the edit a great deal by trimming out less vital action at the head and tail of a shot to keep the story moving along. Hold on to your moments and cut the rest into a smart clip.

<< PREVIOUS
Editing The Narrative Short

Rough cut and fine cut assembly; creating the movie in post-production.



Screen Continuity

If there’s one argument on the set with repeat-offender status, it’s often about screen direction – and not just for newbies. Seasoned pros even get into it.

By Stavros C. Stavrides


Screen Direction

Once screen direction is established, it must be maintained in each progressive shot. This also applies to the direction our performers move, face, or look at, even when they are not moving. 

When screen direction fails, actors can seem like they’re not facing each other in conversation, not looking at what they are supposed to be looking at, or instantly changing the direction of travel back to where they started. We could have one confused audience!

Now bear in mind, this is a rule. That means you may deliberately break it for the desired effect, such as in a montage. One filmmaker may break a rule knowingly to achieve an effect, another may stumble into it accidentally. Which would you rather be?

When Screen Continuity is misapplied, it can jar or confuse your audience, and really tee off your editor.  

Axis of Action, Imaginary Line, 180-Degree Rule

Here’s a quick primer video:

YouTube player

So how do we keep track of screen direction while we’re managing the many aspects of a hectic production?

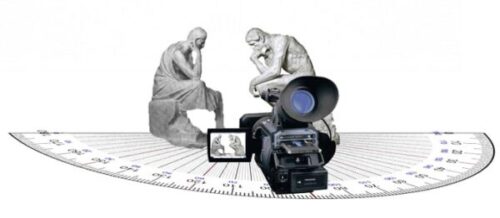
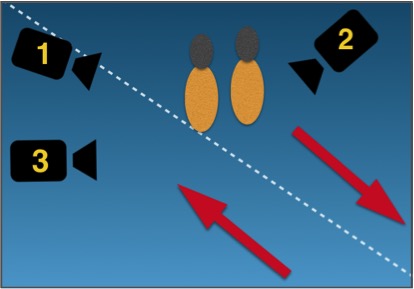
The Imaginary Line, or ‘Axis of Action’, or the ‘180-Degree Rule’ is the key tool used by filmmakers to maintain screen direction. It works like this:

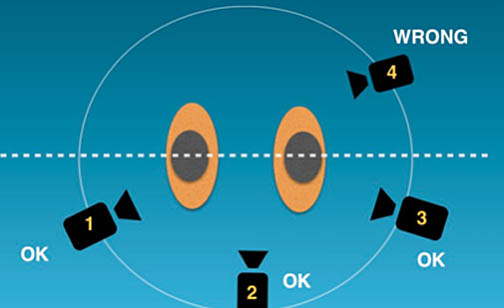
As we look down on the two subjects in this diagram, we draw an imaginary line through them, in the direction they move or face.

Imaginary Line, or Axis for Continuity of Screen Direction

If all shots are done from one side of the axis (shots 1,2,3), they cut together with consistent screen direction.

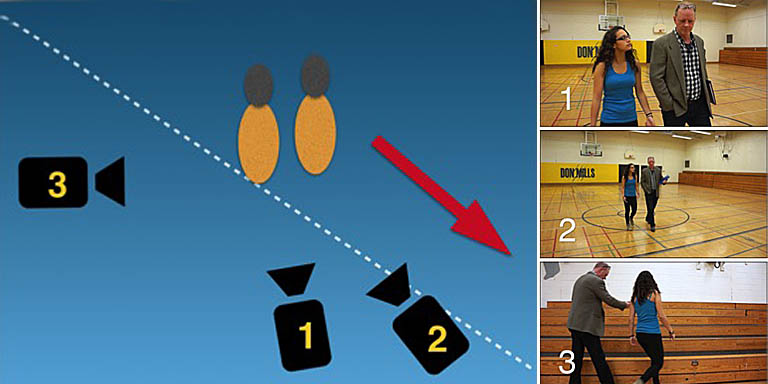
In the following example, a teacher and student walk and talk, then sit at a bench. This rule guarantees both screen direction and matching eye lines.

A Working Example

Correct Screen Continuity movement

Shots 1, 2 & 3 are filmed from the same side of the imaginary line (the axis). Subjects move left to right in every shot. These shots cut together seamlessly, preserving a left-to-right walking direction.

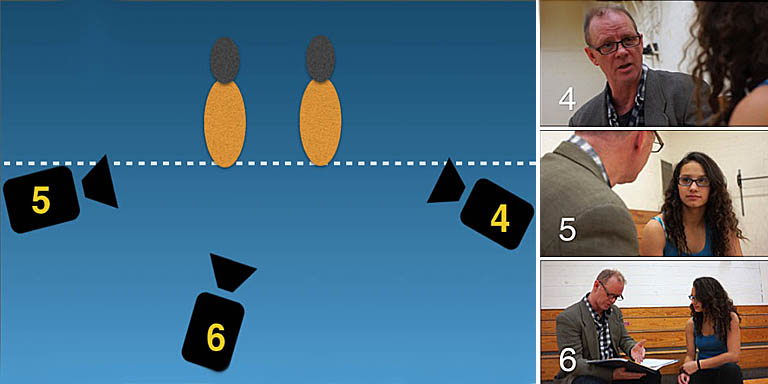
Correct Screen Continuity Dialog

Shots 4, 5 & 6 at the bench also stick to one side of the imaginary line. When shots are cut together, the eye lines will match. The actors appear to face each other instead of away.

When It Works:

YouTube player

When It Fails:

YouTube player

Shot #2 above steps on the ‘wrong’ side of the line.

Imaginary line or axis crossed affects continuity

When #2 shot cuts with the others, the subjects appear to change direction.


This article is a brief drawn from the ‘Screen Continuity’ chapter of
Cyber Film School’s MultiTouch Textbook


Remember:

Your subject is free to travel cross-screen, toward or away from the camera – directional movement will also always be intact as long as the camera doesn’t cross the axis.

In the following excerpt from our Book page, the clip from Boyz ‘n the Hood (1991) examines some tricky continuity when actors look off-camera and follow movement in the frame. Again, the camera stays on one side of the line, but subjects and their eye lines may freely move.  Watch boy number two move his gaze in response to offscreen movement. Play this video a few times for a good study, and imagine how you would plan this coverage. 

YouTube player
Boyz ‘n the Hood (1991)

Can We Ever Cross the Axis?

The rule says you cannot, but as with many rules, there are loopholes.  If we use one of the following techniques to avoid can avoid jarring the audience, we can smoothly cross the axis within the scene and resume coverage from the other side. Here are come ways to that:

Actor or Camera Crosses Axis

  • You can cross the axis if any of the actors are seen changing screen direction within a shot. We then resume the rest of your coverage from that new side.
  • Precede an axis change with a neutral shot. A neutral shot is one where the subject moves directly toward or away from the camera so that the sense of direction appears neutral – neither left nor right.

These techniques visually trick an audience, so we can use this lapse of screen direction to cross the axis and change screen direction on the next shot:

Here’s an example where an actor is neutral then changes direction in a shot:

YouTube player
Neutral Shot shifts from neutral to directional

Insert a Cutaway Shot

Cut to a cutaway shot, such as a couple sitting on a bench, a bird, or a stream. In the example below, it’s a dog. We then change the axis in the following shot, and shoot the rest of the shots from that side. This may be the most clever way to hide the fact you’ve crossed axis by mistake.

Crossing of the axis by using a cutaway. Watch for it at the 20-second mark.

Alternatively, you can dolly or otherwise move the camera across the axis during the shot so the audience sees the move, then shoot the remaining shots on the new side of the axis. The camera actually crosses DURING the shot. 

Now that we’ve been through the basics, there’s a lot more about screen continuity to cover in later posts, such as dealing with a meandering or zigzag path, talking through and moving through doorways, among others. But for now, keep this info in your pocket for that inevitable day you find yourself in an argument on the set. Or better still, share it for that “I told you so” moment.  It could save everyone a whack of valuable production time – and headaches in the edit!