“Don’t Do a Short Film!”

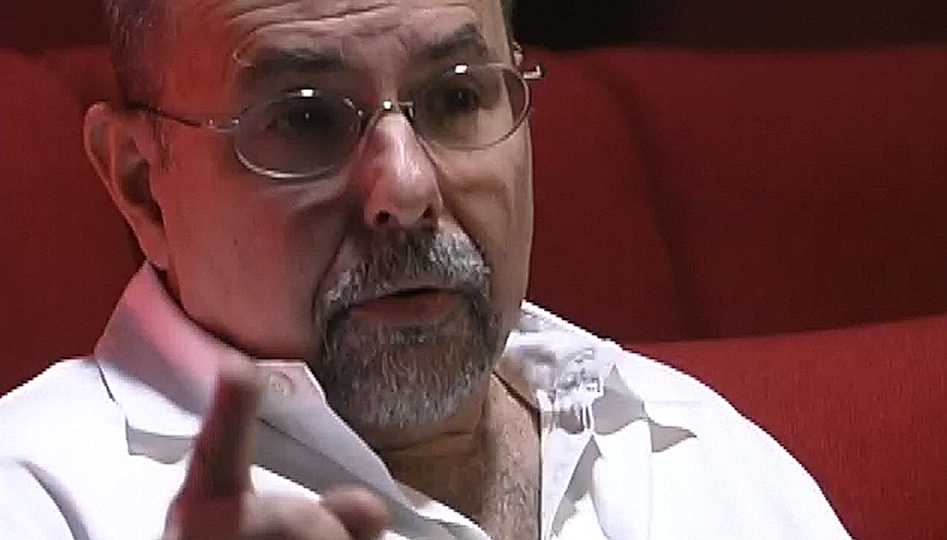
The long and the ‘short’ of it with Two-Day Film School guru Dov Simens

We had the pleasure of interviewing filmmaking Two-Day Film School guru Dov Simens some years ago for Cyber Film School. What a gas! He’s bigger than life, a straight shooter, and what you see is what-you-get with this guy.

by Stavros C. Stavrides


Dov breaks down the filmmaking process, from script to production as a system based on a formula.  

For example, “Don’t let anyone tell you screenwriting is not a formula,” he says. “Screenwriting is a formula. We took it off of Shakespeare. Shakespeare took it from Marlowe. Marlowe took it from Plato. Plato took it from Aristotle. And I guarantee you Aristotle took it from a caveman!” He’s proud to teach.

Love him or hate him,  he’s had some interesting names walk through his doors before they became household names (well, at least in a filmmakers household – for the filmmakers who have houses) – Quentin Tarantino, Chris Nolan, Spike Lee, Kevin Smith, Queen Latifah, Guy Ritchie, among others.

He spells out his formula of feature filmmaking as he sees it. He advises that if you’re going through the trouble of hiring gear, actors, or a location, may as well do a feature – not a short film. Here we have his seven-minute-eleven-second hell-raising tirade that is his formula.  If you dig his drill sergeant manners in these few minutes,  imagine a two-day power weekend with Dov Simens!

We shot this interview some time ago – so his references to distribution revolve mostly around theatrical markets. Otherwise, Dov’s advice is timeless.

We had so much fun hanging out with this guy. Please leave comments below so we can kick around his ideas, for better or worse. Do you agree with his approach? Is filmmaking a formula? 

“Stop being scared of the word feature!”

 You can visit Dov and explore his program at webfilmschool.com  
*This link is provided for informational purposes and as a courtesy. Publisher of this post does not receive compensation, nor is it an endorsement. 

Ahead

  • Rhythm & Pacing
  • The Screenwriting Formula
  • Getting a Name Actor
  • Theatrical Distribution
  • The Production Formula

TRANSCRIPT:

It’s so dumb! I’m going to be the only teacher in the world that’s ever going to say, “Don’t do a short. Don’t do a short!” Does anybody buy shorts, that writes checks? NO! So your first business decision in the film industry is to make something that you are guaranteed not to be able to sell. Stupid!

Now let’s stop being scared of the word “feature,” but let’s do a feature that you can handle, which is a dressed up stage play, a courtroom drama, a one-room location. I jokingly in my class say, for the first feature film, “Here’s your formula. Take twelve kids to a house and chop them up. That you can handle. You know, it’s possible that will get out there. And there’s not one of you out there listening right now to this that can’t get a camera, can’t get some film or tape, can’t get twelve actors that are called waiters, put them in a room and tell them to talk for 90 minutes. Hit the “ON” Button.

Learn Rhythm and Pacing

“It takes about four or five scripts.”

The sole single biggest problem of first-time filmmakers had never become a second time filmmaker is they fall in love with the first typing that comes in front of their face, especially if they typed it themselves. They all believe they’re instantly Michael Jordan the first day they pick up a basketball. And in the film industry, in the writing industry, we believe even if you’re gifted about writing, you don’t really learn how to write the great script until your fourth or fifth script.

You got to learn the rhythm, learn the pacing. You can learn the formulas from the books. You can learn how to type from the books. But somehow the rhythm you can’t learn. It just happens. You got to play a little basketball for a while. You got to rehearse, and it takes about four or five scripts.
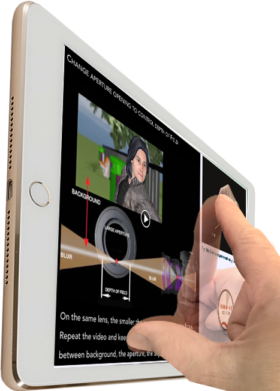

Fast-Track Into 1st-Year Level Film Education
Made for Apple Books

Get beyond mere tips & tricks and how-to tutorials. This beautifully designed learning system is both a textbook and a structured course in one volume.
Learn from it. Teach with it. Gift it.

Visit the Book Page


The Screenwriting Formula

“I’m the blatant film instructor that cuts right to the chase.”

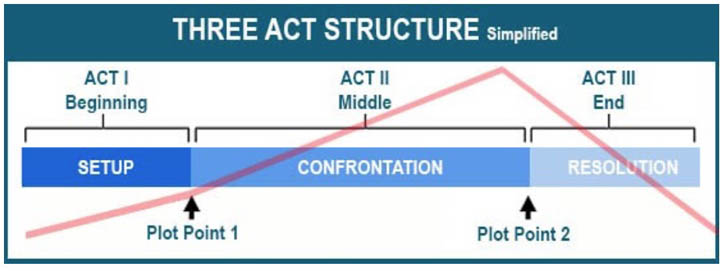
And the screenwriting instructors that are out there – Bob McKee, Syd Field, John Truby, Michael Hauge, Linda Seger, Viky King, Madeleine DiMaggio, they’re all very good. They give intensive one-day, two-day, three-day classes, etc. And they all talk around the Hollywood formula. They’re all paranoid about saying it’s a ‘formula’, screenwriting. They all swear it’s not a formula ‘cause god bless, some critic might criticize them for teaching formulaic screenwriting. And they all then teach a formula and they swear it’s not a formula, and they’ve all created little pseudonyms for what this is –‘paradigm,’ ‘inciting moments’, ‘plot points,’ whatever.

Well, I’m the blatant film instructor that cuts right to the chase. I’m gonna tell you right up front: screenwriting is a formula. We took it off of Shakespeare. Shakespeare took it from Marlowe. Marlowe took it from Plato. Plato took it from Aristotle. And I guarantee you Aristotle took it from a caveman.

Now you want the formula? I’ll give it to you. I’m proud to teach! I’m proud to be the great teacher, and here’s the formula:

Every screenplay that’s great has 5 “uh-oh’s”, “Oh shits!” and one “Oh my god!” in it – 5 “uh-oh’s”, “Oh shits!” and one “Oh my god!” in it.

There are 40 scenes in a movie maybe there are 50. You got your rollercoaster ride that’s built in there:

  • Introduce the boy
  • Introduce girl
  • Introduce the situation
  • Introduce the desire
  • Introduced they want to take an action
  • Introduce they take an action

Everything seems to be good and now, UH-OH!” We’re only about 8 to 10 minutes into the movie. Pull the carpet out from underneath them

Two scenes later give them a further complication called an, “Oh shit!” But we’re only about 12 to 15 minutes in the movie.

“Uh-oh! Oh shit…Uh-oh! Oh shit…Uh-oh! Oh shit…”

And then, “Oh my god! No way will they ever get through it!”

Two scenes later it gets resolved.

 Getting a Name Actor

It’s very important to have a name attached to your project. You’ve heard that ten thousand times. It’s very important to get a name attached to your project. But to get the name attached to your project you don’t have the check to pay it on your first project, so it’s ridiculous stuff. But when you get to your third feature film…If your first feature is a no-budget feature film that gets out there gets to the proper festival, gets picked up by a distributor, they will do creative bookkeeping, but they’ll make you famous and you probably won’t make a penny from it.

But then on your second film, now you’re gonna get a salary upfront a higher budget and you get a little bit of money in your pocket, you make your second film. And if your second film gets out there and makes money, now enough of the names! (If) the industry found out that “that guy or that woman is good, I want my name attached to their project because they’re going to take me to another level and they’ve proven they can make money,” then they’ll come to you.

Theatrical Distribution

“The best thing about you is when you’re done you’re broke!”

Distribution. If you can’t distribute you got to distribute and you’re not gonna distribute. Stop this dribble with this self-distribution crap. (If) you take your film, make a bunch of prints, put them in Edmonton, put in Calgary, put them in Toronto, put them In Denver, put them in Miami in a small theater, you’re gonna be in small claims court in every state in every city In North America trying to collect from theater owners that are close to broke. And if they ever do pay, you take six months before they ever pay you, so yes you need a distributor. You need a distributor.

You’re not going to get the major distributors – Warner Brothers, Paramount, 20th Century, Universal, but each one of the major distributors has a mini-major arm that’s smaller than a Miramax or New Line which is good also. A Strand Releasing, a Fox Searchlight, an Orion Classics, Sony classics. Now where are you gonna get this distributor? You know what? You’re gonna go to film festivals. You take your film and go to a festival. Every city in the world has cultural events, opera, ballet, symphony, the last thing is a Film Festival. So they need your film. But understand the film festival will charge you entrance fees, submission fee, projectionists, and booking the theater.

Why do you go to a festival? Every distributor in North America is making their own films themselves, but they know there are people out there like you, quote “independent filmmakers” that are dumb enough and stupid enough and naive enough to spend your own money. So obviously distributors are looking for you. You’re free! Do you know why distributors love you? You’re free. You’re cheap. You have no overhead, no guild or union affiliations, no development cost, and the best thing about you is when you’re done you’re broke!

The Production Formula

Get the script. How much money do you have? How many weeks can you afford to shoot? You can afford one week of shoot, that’s actually nine shooting days. Monday you rent the camera and the equipment over two weekends. You got a 90-page script, you got ten shooting days. That’s your shooting schedule.

(If) you got enough money for two weeks to feed a crew and pay your crew and rent the equipment for two weeks, you got 13 shooting days. Divide 13 into 90 pages, that’s a script – that’s 7 shooting (pages per) day. You got enough money for three weeks? That’s 18 shooting days divide that into a 90-page script, 5 shooting pages per day.

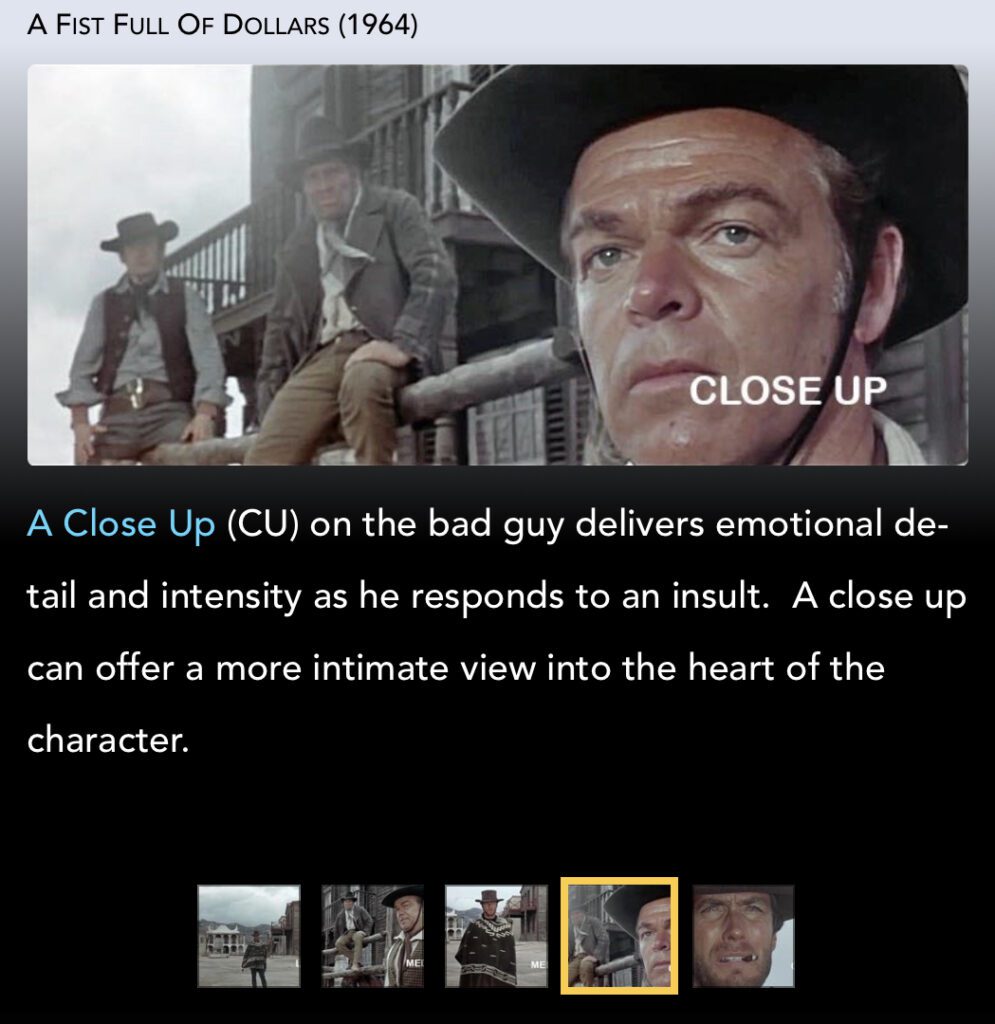
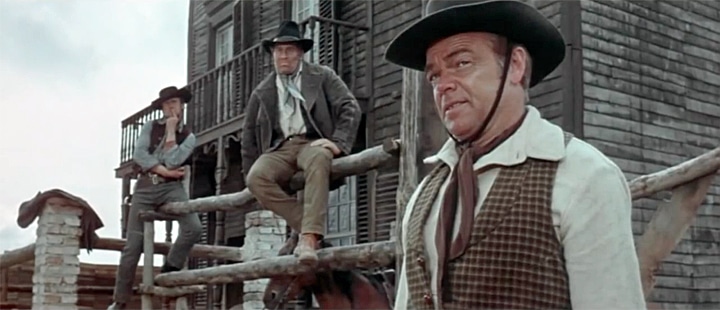
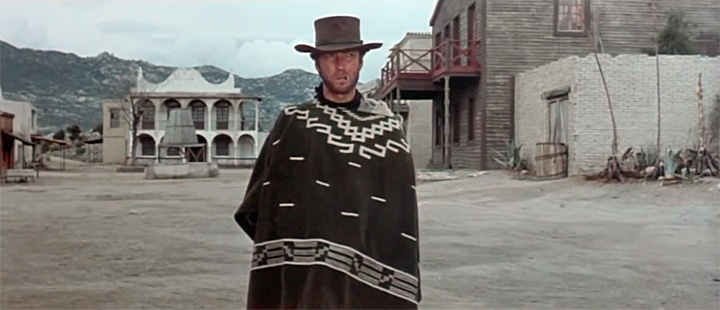
Five pages per day, you got approximately 12 hours of shooting daylight in the day, let’s take two hours for eating and getting ready. 10 hours of shooting, so five pages – one page every two hours. And in those two hours, I want a master shot, two medium shots, a reaction shot, a point-of-view shot, a cutaway shot, and a cat-in-the-window shot. So you got 18 to 20 minutes for each shot. On each shot, I want key lighting, backlighting, fill lighting, and possibly an eye light. And I don’t want the camera just on a tripod. I want it with some dollying and some little bit of camera movement, and “let’s go!”

MORE ARTICLES 

Fast-Track Into 1st-Year Level Film Education
Made for Apple Books

Get beyond mere tips & tricks and how-to tutorials. This beautifully designed learning system is both a textbook and a structured course in one volume.
Learn from it. Teach with it. Gift it.

Visit the Book Page


Build Your Film Shot List Like A Pro


When reading a script or recalling a film, we often idealize its vision and the picture is flawless in the perfect world of our minds. But as directors planning our own films, it’s an entirely different exercise.

Updated December 15, 2022
by Glen Berry, edited by Stavros Stavrides


What Is A Shot List?

If you don’t know where to begin building your shot list, you need to get a read on the emotional content of your material.

The director studies the script and imagines how the scene will play visually. The process is called ‘breaking down the script.’  A director lists the types of shots that will ‘cover’ the scene. The list of shots is called a Shot Breakdown. 

The Shot Breakdown is then communicated to the creative team as a Shot List, storyboard, or both.

Shot list example shows sequence of shots on a spread sheet

What a shot list does need to contain, at minimum, is a list of shots where each shows a description of the action and shot size – Long Shot, Medium Shot, Close Up, etc. 

The shot number and its corresponding scene number help organize the shooting schedule. The list may then be organized into an order of filming on the schedule.

Building Your Shot List

When reading a script or recalling a film, we often idealize its vision and in the perfect world of our minds, the picture is flawless. But as directors planning our own films, it’s an entirely different exercise.

As visual people reading a script on the first pass, we may see the movie play out in our heads. The visual treatment plays as we go from line to line. However, as readers, we’re mostly feeling the effect as we read, not so much focused on the precise order of shots and how they specifically flow together.

Similarly, when we think back to our favorite movie, we can recall specific shots, effects, and sequences, but not every shot from every scene, the order of shots, how long each stayed onscreen, and how each transitioned into another.

If we were focusing on all that as an audience, and not hooked on the story, that film is in trouble!

When reading a script or recalling a film, we often idealize its vision and in the perfect world of our minds, the picture is flawless. But as directors planning our own films, it’s an entirely different exercise.

Once we’re past story structure and script, we need a well-developed idea of how the visual elements unfold in our movie. Creating a shot list, shot by shot, scene by scene, sequence by sequence, we make a plan. 

It needn’t be perfect at first, but a strong vision of the outcome will guide us as we select various shot types, moving from master shots to close-ups, with purpose.

So once again, we face a blank page as we prepare to begin our shot list. How to begin? Let’s start with a scene.

REMEMBER: We are presenting a conventional approach to scene construction. As professional directors, we determine the key moments and plan accordingly, rather than select shots in a cookie-cutter template. However, if you don’t know where to begin, it’s a way to get started and depart from there.


This post is a support article for the “Shot Vocabulary” chapter in Cyber Film School’s 
Multi-Touch Filmmaking Textbook


Breaking It Down

Story board is a visual version of the shot list.

Many of us are aware that an entire film has a dramatic curve – beginning, middle, and end. We may have even identified the movie’s plot structure with ‘high points’ like:

  1. Exposition
  2. Inciting Moments
  3. Rising Action
  4. Conflict
  5. Climax, and
  6. Resolution

We’ll examine these High Points further below.

Where an entire picture’s structure may be analyzed with these high points, so can almost every scene of our script. Each scene may be structured in the same way, with its resolution at the end of each scene driving us to the next scene.

Think of a scene as a kind of visual paragraph. In literature, where a paragraph on the page is made up of sentences and words, a sequence of shots in a film makes up a scene.

Our task right now is to select the size and angle of each shot and sequence them to construct a scene.

Shot Size & Angle

In general terms, the Wide Shot (or Long Shot) is often expository, offering us factual information about the scene’s setting, and/or establishing the relationship between objects and the changes between them. In short, it’s the scene’s ‘setup’.

The close-up tends to be concise or expressive, calling attention to more specific detail meant to convey a specific emotional impact.


Wide Shot exposes enormous amounts of information. It is commonly used as a tool for conveying large amounts of information to the audience – geography of the space, time period, setting, mood, activity, characters in the space, and all action taking place.

Compared to the Long Shot, the Close-Up is hyper-focused. It conveys context, emotion, or grandiose effect. Trained on a person’s face, it delivers emotional detail so the audience gets to feel the impact on the character and more closely identify with their circumstance.

Extreme close-ups are often used at the climax of the scene to heighten the intensity of the moment for the audience.

As the action rises toward the climax of the scene, a common technique is to ‘tighten’ the shots incrementally from the wide shot to a close-up.

A Wide Shot exposes enormous amounts of information. It is commonly used as a tool for conveying large amounts of information to the audience – geography of the space, time period, setting, mood, activity, characters in the space, and all action taking place.

A movie’s entire story is commonly structured with rising action to a climax, then a resolution. A single scene is often written in the same way, then visually treated by its director with shot sizes to rise and fall in intensity, through shot selection.

If we were to stack up shots in the order of wide shot, full shot, medium shot, and close up, we would have the effect of ramping up the scene’s intensity as it progresses up the ladder of rising action of the dramatic curve.

Here is an example of how the shots stack up in a sequence of rising action in a confrontation scene from the classic “A Fist Full of Dollars”, directed by Sergio Leone and starring Clint Eastwood as our protagonist.

1. Long Shot

2. Medium Shot

Shot list Medium Close up

Compared to the Long Shot, the Close-Up is hyper-focused. It conveys context, emotion, or grandiose effect. Trained on a person’s face, it delivers emotional detail so the audience gets to feel the impact on the character and more closely identify with their circumstance.

3. Medium Shot

Cant Eastwood Medium Shot Fistful of Dollars

 4. Close Up

Fistful of Dollars showdown shot construction

5. Close Up

Extreme CU Clint Eastwood Fistful of Dollars

Full Scene Study

Now let’s study the actual scene.  This scene appears in Act I of the movie and has preceding scenes and following scenes. The scene contains:

  1. Exposition
  2. Inciting Moments
  3. Rising Action
  4. Conflict
  5. Climax, and
  6. Resolution

As discussed earlier, we can find these elements in the dramatic curve of an entire movie, but also find them contained within one scene. First, we’ll identify these high points, then examine the scene’s shot construction.

Read the subtitles for cues. Then study the extended time-coded notes below the video.

The ‘High Points

At 0:00 – The Exposition in this clip begins with our protagonist talking to himself. This sets the stage for our conflict. He’s a killer looking for a job. “I don’t work cheap,” he says and is ready to show off his skills to a potential employer.

0:27 – We see this potential employer taking a watchful position on a balcony.

0:30 to 1:15 – The Inciting Moment begins as our protagonist walks a path of danger. He starts with, “Get three coffins ready” as he passes an undertaker and heads toward his targets, who notice him approaching.

1:15 – The Rising Action kicks off as he confronts the men. His conversation draws them deeper into a course of conflict with moments of escalation along that path.

1:55 – The Peak Moment when he throws back his cloak to reveal his gun. His intent to draw is the point of no return, as recognized by one of the antagonists in the foreground.

2:32 – The Climax of the scene, where the protagonist draws his pistol and kills the four men, the conflict is now resolved.

2:25 – With Resolution, the climax unravels. Note the shots now ‘relaxing with wider framing.  The Sheriff appears to arrest our protagonist who refuses to acknowledge the Sheriff’s authority and walks away.

In our Denouement, what do we about the protagonist? He is a killer willing to provoke conflict, killing four men, then walking away in the face of authority.

If we were to watch this scene on its own, unaware that it is part of a larger film, we could easily assume that the protagonist is really the antagonist, since he is the one provoking the fight and doing the killing. However, as the hero seeks an apology from the men about insulting his horse in a previous scene, we get the hint that the men are mean-spirited killers who deserve some get-back.

Because this scene is part of a longer film, information, and events from previous scenes play into the conflict contained in this scene. Thus, the resolution to this scene is incomplete – not the end of the story. Rather, it sets the stage for the further conflict to come in later scenes.


This post is a support article for Cyber Film School’s Multi-Touch Filmmaking Textbook.


The Shots

From 0:00 to 0:30. We open with a Medium Shot (MS) for the exposition of our character and then transition into a long, wide shot. That is our establishing shot that puts the geography of the space into context. These are expository shots.

We then move into some tighter shots, some MS, and Over-the-shoulder two-shots. We then come back out to another wide shot at 0:52 to establish the geography of the corral at the other end of the street,  but we’re still not as wide as the opening establishing shot.  We have the same, wider shot on the reverse angle at 1:15.

From 1:16 to 2:32, our conflict, we see no more wide shots.  We progressively move in tighter and tighter from MS and Two-Shotss to Close-ups. This is no coincidence as we move forward and up the slope of intensity on our dramatic curve, to increasingly tighter shots.

When our protagonist throws back his serape and both sides are committed to conflict, we see nothing but CUs from here to the climax (1:55 to 2:32). The moment of highest intensity is covered in CUs and ECUs.

Immediately after the climax of the scene, we back out of the tight shots for the denouement (2:46). We drop back off of the dramatic curve in terms of intensity and back out to wider shots, although it is an incremental step back from the height of the climax.

We stress once again:  this is a classic scene construction, where wide shots are used for exposition and close-ups for the rhetorical. Wide shots are used in the beginning with progressively tighter shots going up the dramatic curve. The tightest shots, close-ups, are used at the climax and we back off to wider shots for the denouement

If you don’t know where to begin building your film’s shot list, you need to get a read on the emotional content of your material:

Where are the moments of greatest intensity?

What is expository (wide) and what is rhetorical (close)?

Where are the turning points of your scene?

Upon what does the conflict hinge and what actions reveal the nature of the characters in the scene?

If you can identify these moments, you will have an idea of how to use framing in a series of tighter or wider shots to heighten intensity and focus the audience’s attention on the moments in your story.

As the action rises toward the climax of the scene, a common technique is to ‘tighten’ the shots incrementally from the wide shot to a close-up.

NEXT: Scene Coverage: You Can’t Film It All >>


Preview our MultiTouch Filmmaking Textbook

Extreme close-ups are often used at the climax of the scene to heighten the intensity of the moment for the audience.

Here is an example of how the shots stack up in a sequence of rising action in a confrontation scene from the classic “A Fist Full of Dollars”, directed by Sergio Leone and starring Clint Eastwood as our protagonist.

If we were to stack up shots in the order of wide shot, full shot, medium shot, and close up, we would have the effect of ramping up the scene’s intensity as it progresses up the ladder of rising action of the dramatic curvA Wide Shot exposes enormous amounts of information. It is commonly used as a tool for conveying large amounts of information to the audience – geography of the space, time period, setting, mood, activity, characters in the space, and all action taking place.

or
Get More Info


Screen Continuity

If there’s one argument on the set with repeat-offender status, it’s often about screen direction – and not just for newbies. Seasoned pros even get into it.

By Stavros C. Stavrides


Screen Direction

Once screen direction is established, it must be maintained in each progressive shot. This also applies to the direction our performers move, face, or look at, even when they are not moving. 

When screen direction fails, actors can seem like they’re not facing each other in conversation, not looking at what they are supposed to be looking at, or instantly changing the direction of travel back to where they started. We could have one confused audience!

Now bear in mind, this is a rule. That means you may deliberately break it for the desired effect, such as in a montage. One filmmaker may break a rule knowingly to achieve an effect, another may stumble into it accidentally. Which would you rather be?

When Screen Continuity is misapplied, it can jar or confuse your audience, and really tee off your editor.  

Axis of Action, Imaginary Line, 180-Degree Rule

Here’s a quick primer video:

YouTube player

So how do we keep track of screen direction while we’re managing the many aspects of a hectic production?

The Imaginary Line, or ‘Axis of Action’, or the ‘180-Degree Rule’ is the key tool used by filmmakers to maintain screen direction. It works like this:

As we look down on the two subjects in this diagram, we draw an imaginary line through them, in the direction they move or face.

Imaginary Line, or Axis for Continuity of Screen Direction

If all shots are done from one side of the axis (shots 1,2,3), they cut together with consistent screen direction.

In the following example, a teacher and student walk and talk, then sit at a bench. This rule guarantees both screen direction and matching eye lines.

A Working Example

Correct Screen Continuity movement

Shots 1, 2 & 3 are filmed from the same side of the imaginary line (the axis). Subjects move left to right in every shot. These shots cut together seamlessly, preserving a left-to-right walking direction.

Correct Screen Continuity Dialog

Shots 4, 5 & 6 at the bench also stick to one side of the imaginary line. When shots are cut together, the eye lines will match. The actors appear to face each other instead of away.

When It Works:

YouTube player

When It Fails:

YouTube player

Shot #2 above steps on the ‘wrong’ side of the line.

Imaginary line or axis crossed affects continuity

When #2 shot cuts with the others, the subjects appear to change direction.


This article is a brief drawn from the ‘Screen Continuity’ chapter of
Cyber Film School’s MultiTouch Textbook


Remember:

Your subject is free to travel cross-screen, toward or away from the camera – directional movement will also always be intact as long as the camera doesn’t cross the axis.

In the following excerpt from our Book page, the clip from Boyz ‘n the Hood (1991) examines some tricky continuity when actors look off-camera and follow movement in the frame. Again, the camera stays on one side of the line, but subjects and their eye lines may freely move.  Watch boy number two move his gaze in response to offscreen movement. Play this video a few times for a good study, and imagine how you would plan this coverage. 

YouTube player
Boyz ‘n the Hood (1991)

Can We Ever Cross the Axis?

The rule says you cannot, but as with many rules, there are loopholes.  If we use one of the following techniques to avoid can avoid jarring the audience, we can smoothly cross the axis within the scene and resume coverage from the other side. Here are come ways to that:

Actor or Camera Crosses Axis

  • You can cross the axis if any of the actors are seen changing screen direction within a shot. We then resume the rest of your coverage from that new side.
  • Precede an axis change with a neutral shot. A neutral shot is one where the subject moves directly toward or away from the camera so that the sense of direction appears neutral – neither left nor right.

These techniques visually trick an audience, so we can use this lapse of screen direction to cross the axis and change screen direction on the next shot:

Here’s an example where an actor is neutral then changes direction in a shot:

YouTube player
Neutral Shot shifts from neutral to directional

Insert a Cutaway Shot

Cut to a cutaway shot, such as a couple sitting on a bench, a bird, or a stream. In the example below, it’s a dog. We then change the axis in the following shot, and shoot the rest of the shots from that side. This may be the most clever way to hide the fact you’ve crossed axis by mistake.

Crossing of the axis by using a cutaway. Watch for it at the 20-second mark.

Alternatively, you can dolly or otherwise move the camera across the axis during the shot so the audience sees the move, then shoot the remaining shots on the new side of the axis. The camera actually crosses DURING the shot. 

Now that we’ve been through the basics, there’s a lot more about screen continuity to cover in later posts, such as dealing with a meandering or zigzag path, talking through and moving through doorways, among others. But for now, keep this info in your pocket for that inevitable day you find yourself in an argument on the set. Or better still, share it for that “I told you so” moment.  It could save everyone a whack of valuable production time – and headaches in the edit!